Much like a child learning how to tie their shoelaces for the first time, re-stringing an instrument like a ukulele or guitar can be a daunting prospect at first.
Before you make a beeline to your local music store and plead with them to put on a new ‘C’ string, or the even more unthinkable act of installing a whole new set, take a deep breath and take a look at my beginner’s guide!
Don’t forget to check out my guide on how often to change your uke strings, and why you should, too.
Covered in this Article:
Types of Bridges for Ukulele Strings
The first port of call we’ll take a look at are the main types of bridge you’re likely to encounter on your particular model of ukulele.
Tie-Block Bridge
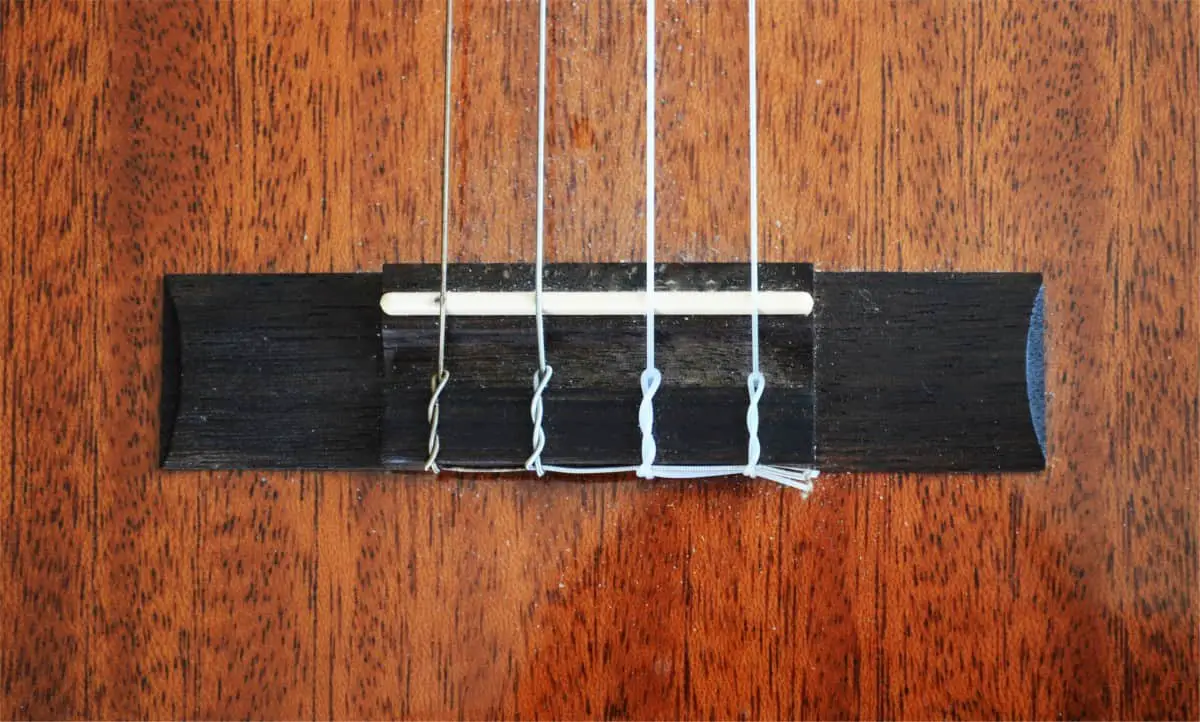
The majority of ukes will feature a standard tie-block bridge, which resembles a smaller version of the type found on a classical guitar. Both instruments use an identical method of string installation, together with nylon or composite strings and wound metal/nylons on the lowest sounding courses.
In the case of the uke, this will only be applicable to the baritone model or a low ‘G’ on a tenor (and occasionally on a concert uke). A tie-block bridge features tiny holes situated perpendicular to the soundboard or top of the uke’s body.
I should add that you can use a ball-end or bead on this style of bridge (see the section on the ‘Pull-through bridge, below), but it generally looks ugly and a little amateurish!
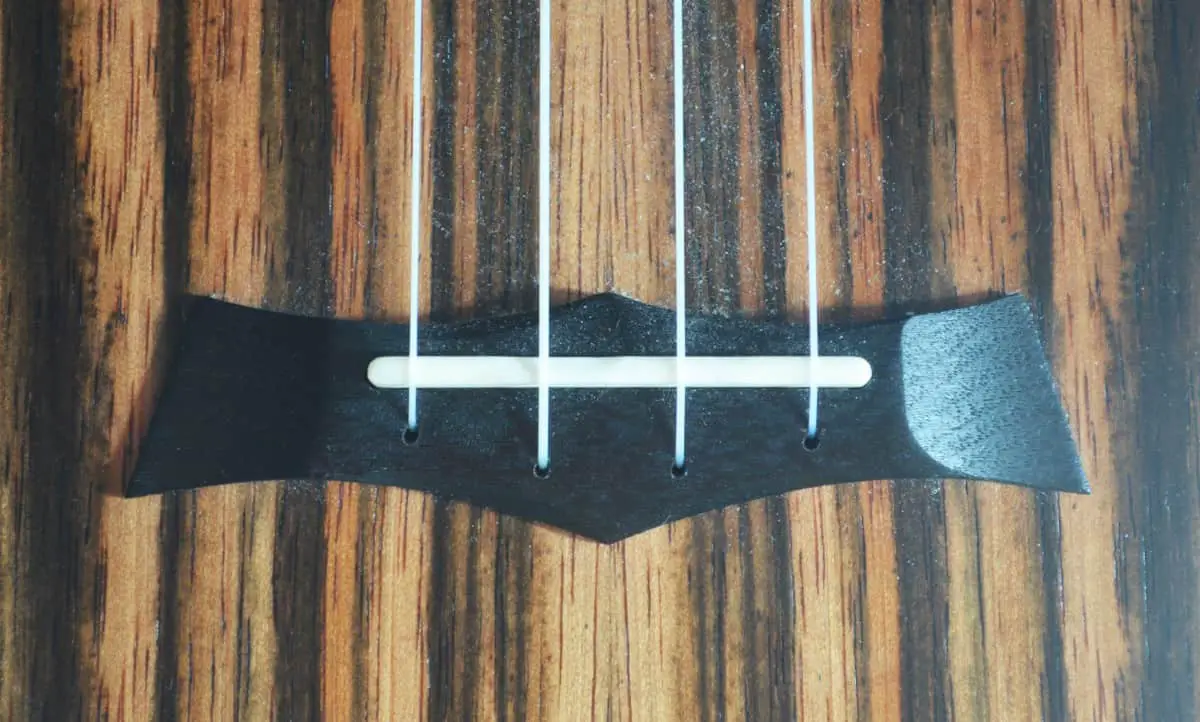
Pull-Through Bridge
Another type of bridge which has gained popularity in recent years features the simple pull-through style, where you don’t have to learn the knotting arrangement found on traditional models.
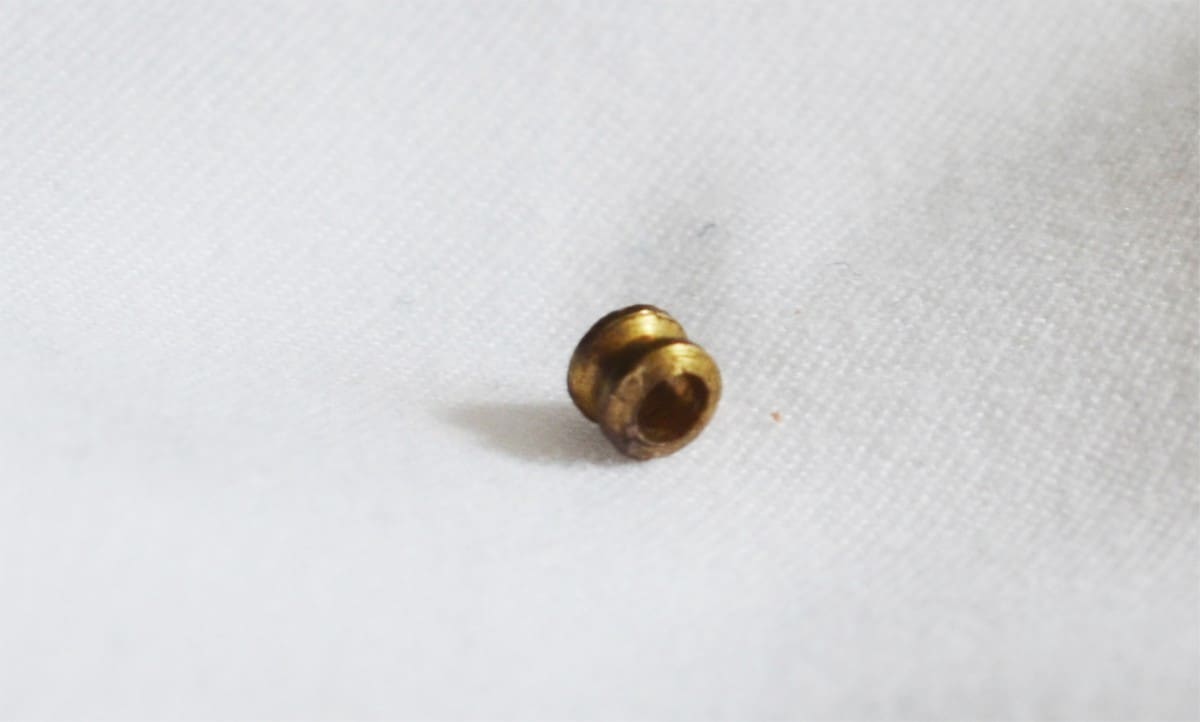
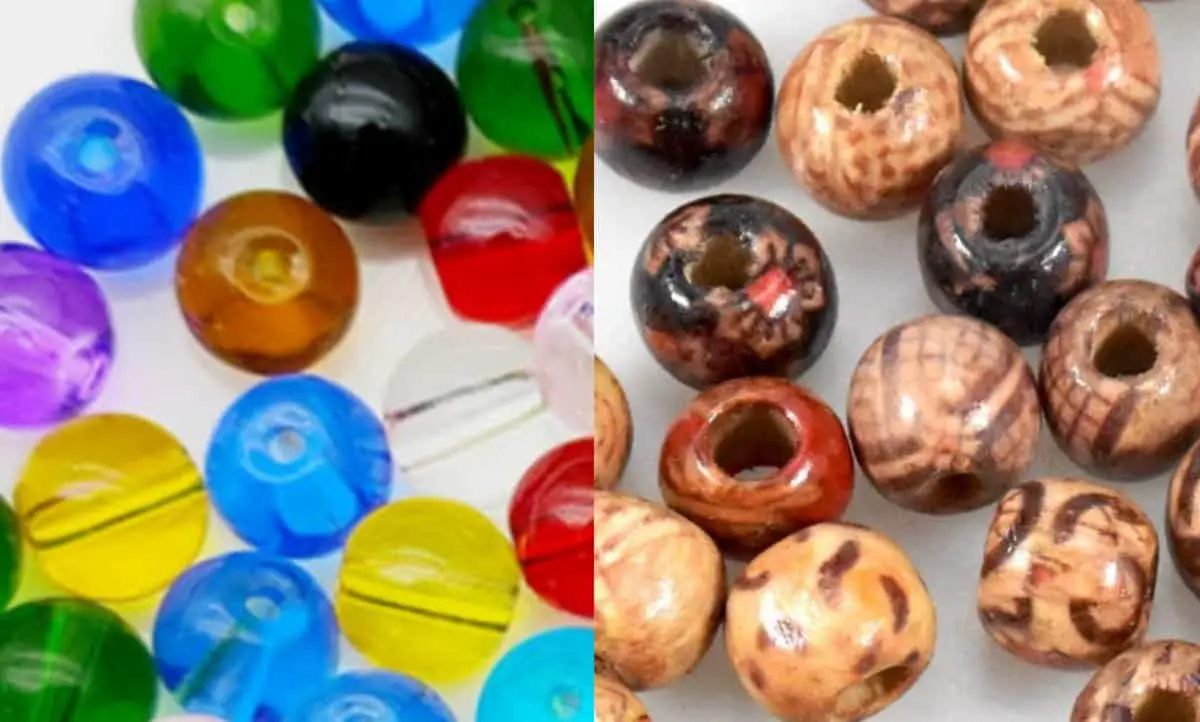
For this type of bridge you’ll need metal ball-ends from a set of acoustic or electric guitar strings or some mini necklace crafting beads (wood, metal, plastic or glass).
These can be re-used, so it’s very much a one-off purchase (unless you lose them of course!).
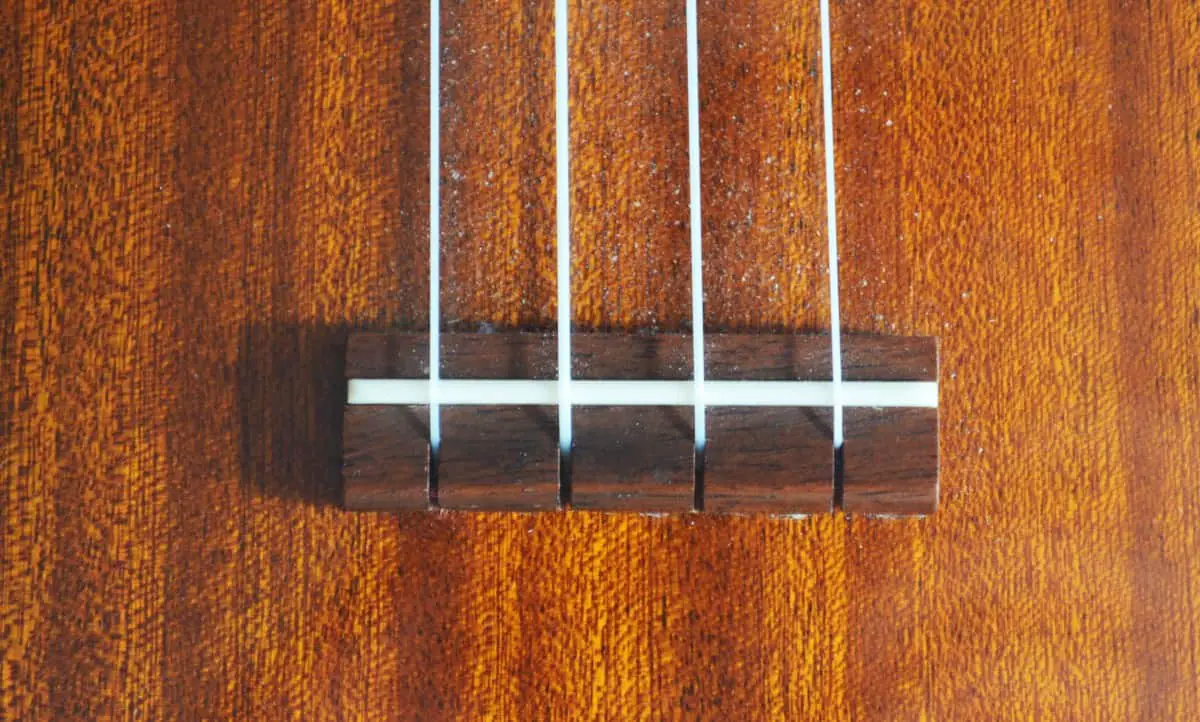
Slotted Bridge
Arguably, this is the simplest style of bridge to deal with. There’s not a lot of explanation needed here, except to say, all you have to do is tie a big enough knot on the end of the string; pull it tightly and slip it under the slot.
A double knot will generally suffice, but a triple is fine too, if you’re concerned it might slip out of the slot. There should still be plenty of string to feed through the capstan on the headstock.
How to Tie Ukulele Strings to a Tie-Block Bridge
As I alluded to at the beginning of this article, the whole stringing arrangement can look a little intimidating, but in reality, it’s easier than tying a shoelace!
Take a look at the detailed photographic steps involved in the process:
Step 1: The string before insertion into the hole on the tie-block bridge
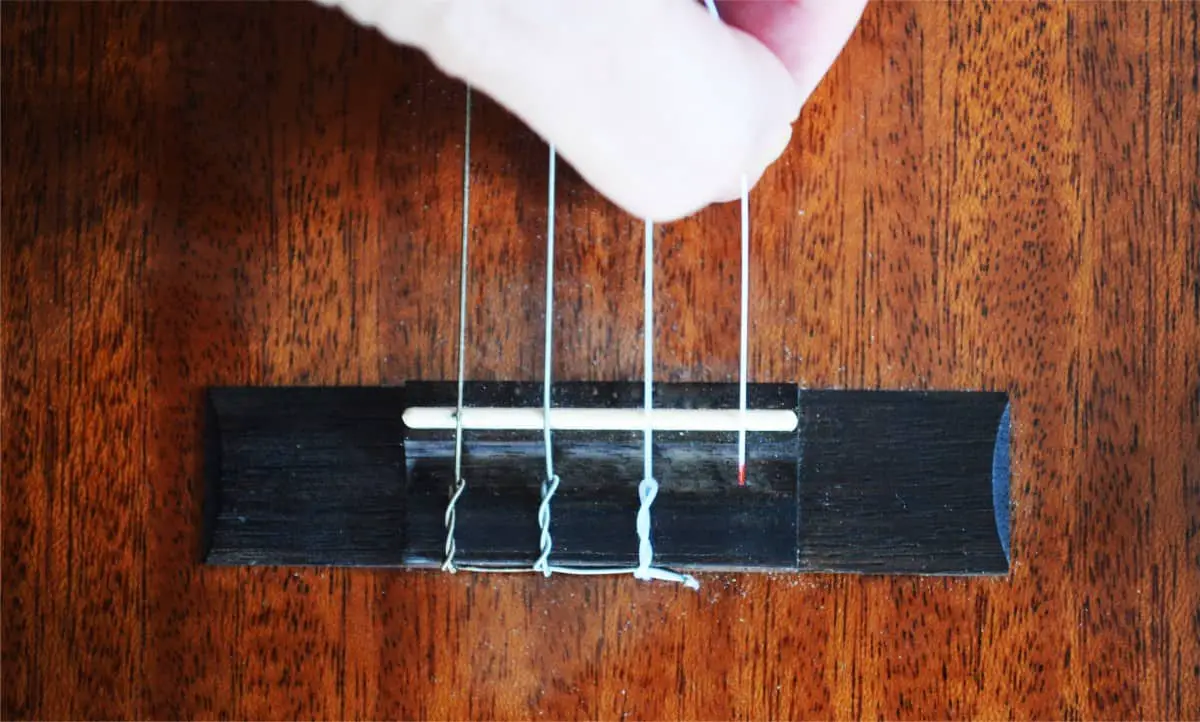
Step 2: Slide the string through the hole, from the saddle side (the white string bar).
Inserting it the other way is much fiddlier. At this stage, make sure you have a long enough end to create a successful series of loops. If it’s too short, it’ll be too fiddly to feed through or not long enough to complete the process. About 4″ should be fine.
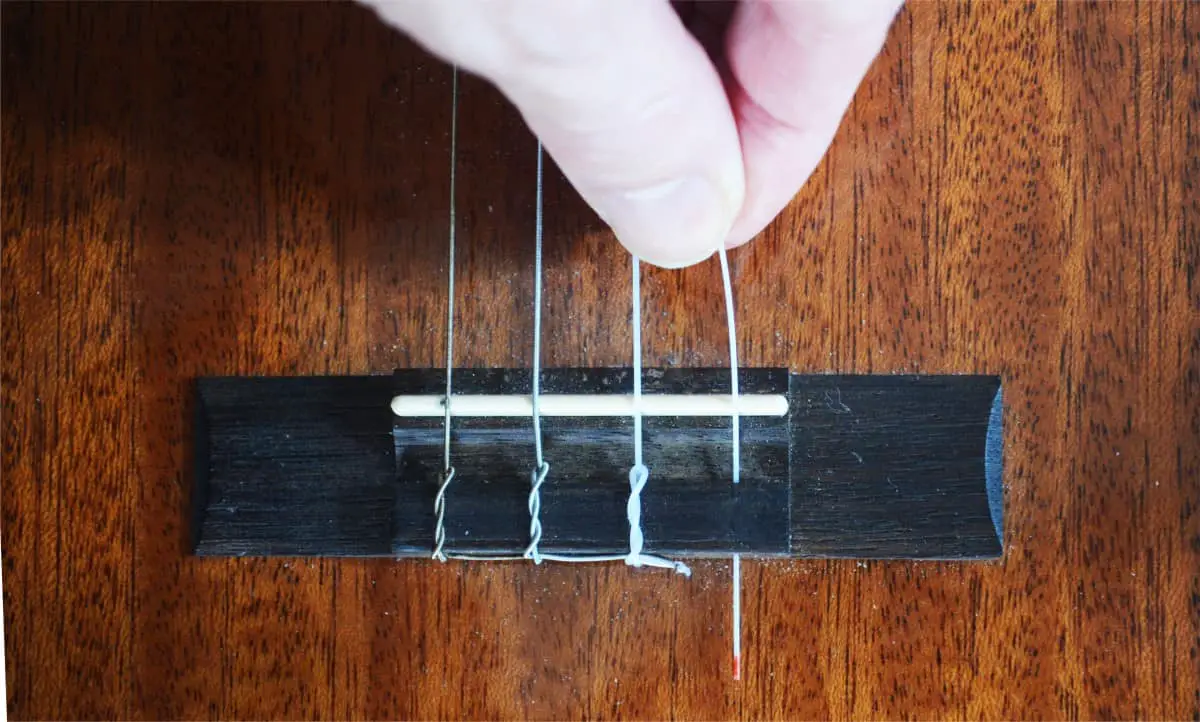
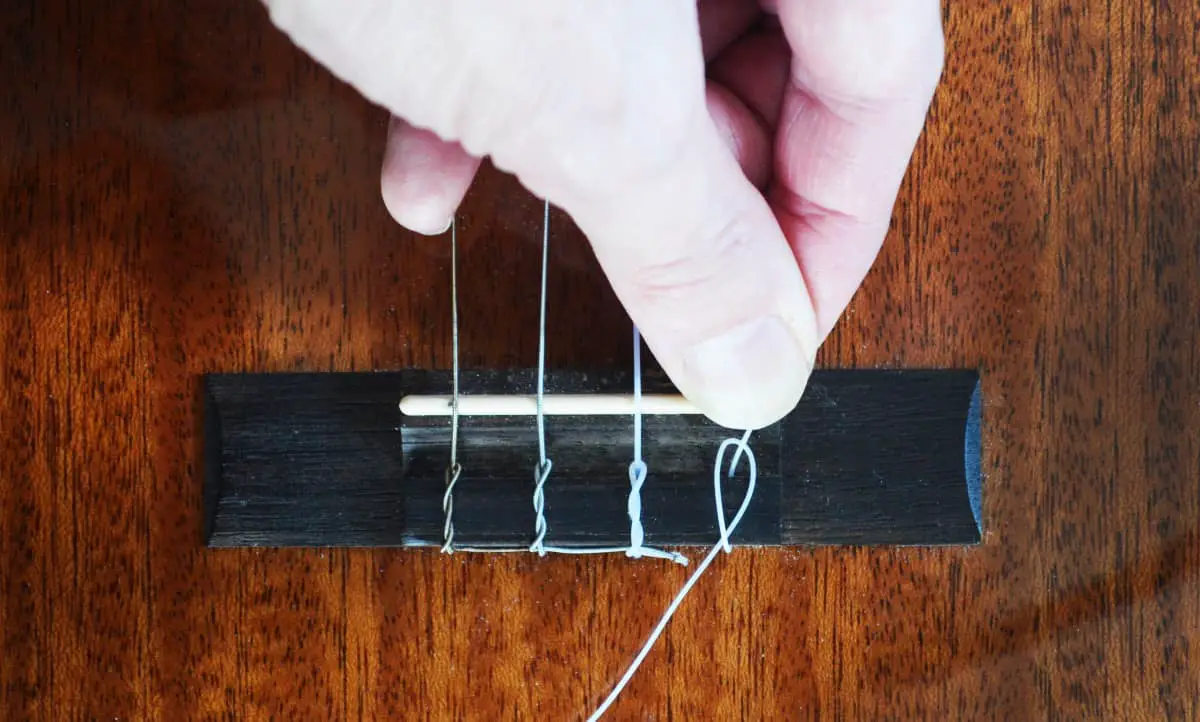
Step 3: Bring the shortest end of the string around to form an elongated ‘O’ shape and slip it under the main part of the string.
Step 4: Now feed the end of shortest part of the string through the ‘O’ as if you were about to tie a simple knot.
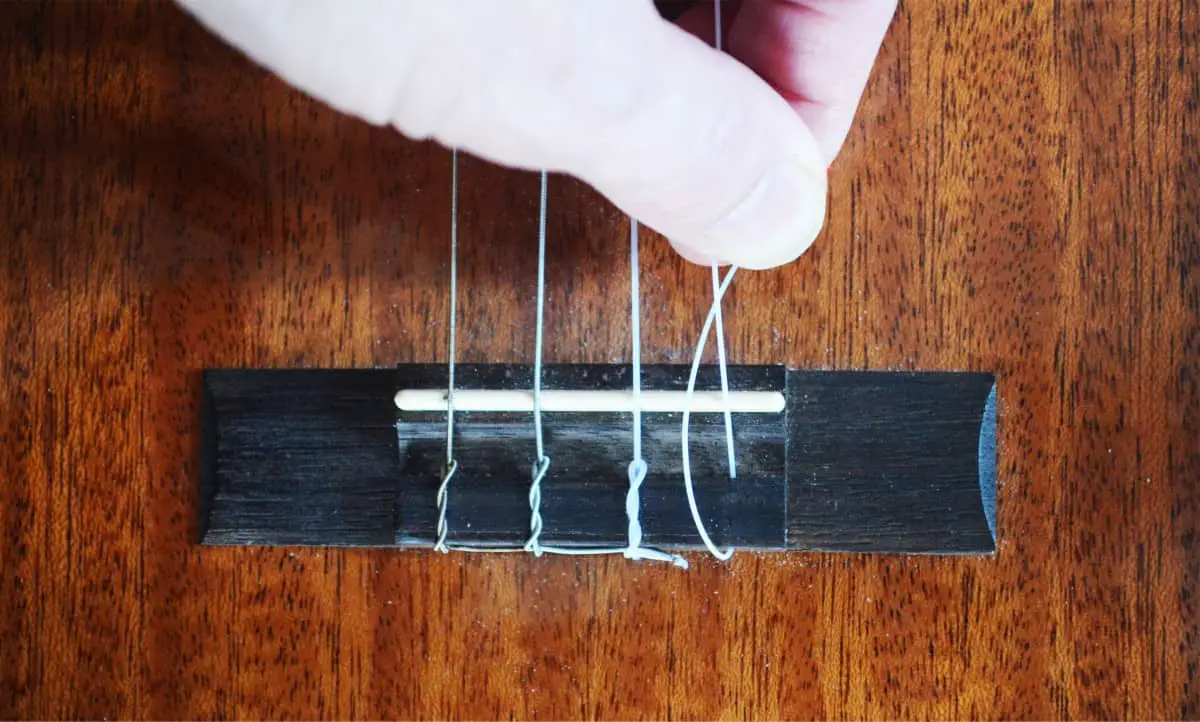
Step 5: It should look something like this:
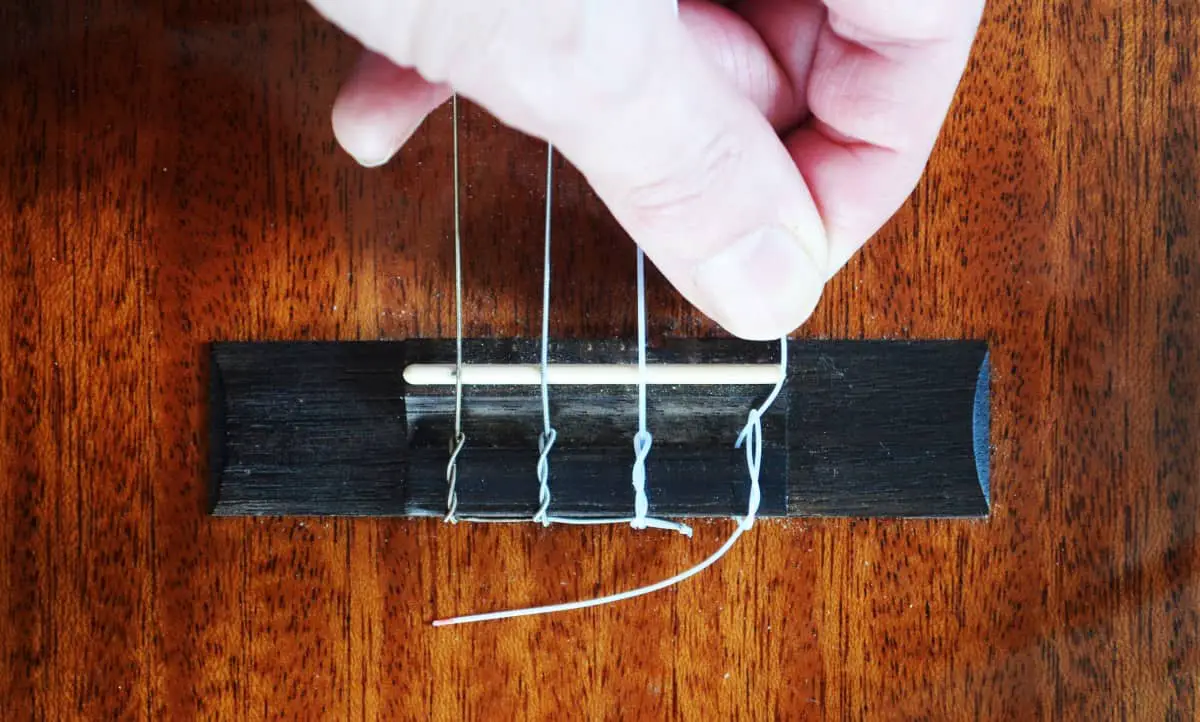
Step 6: The string should now be slipped under and over again to form a figure eight, rather than the existing ‘O’ shape.
To complete this part of the process, go under and over again on the unwound strings until you have a slithering snake-type of effect. The key with this step is to focus on the under and then over technique.
On a new uke, you may find the ends of the strings are neatly overlapped underneath each other. If you’re only changing the one string, this isn’t really achievable and in practice is a largely cosmetic exercise.
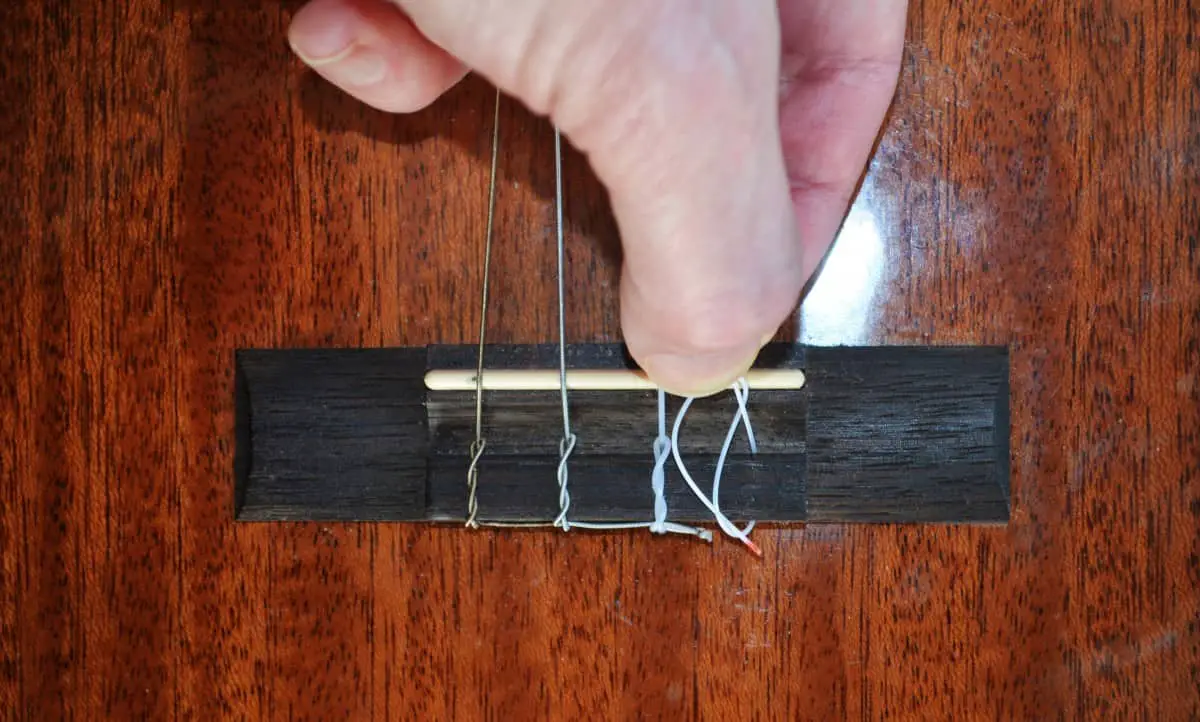
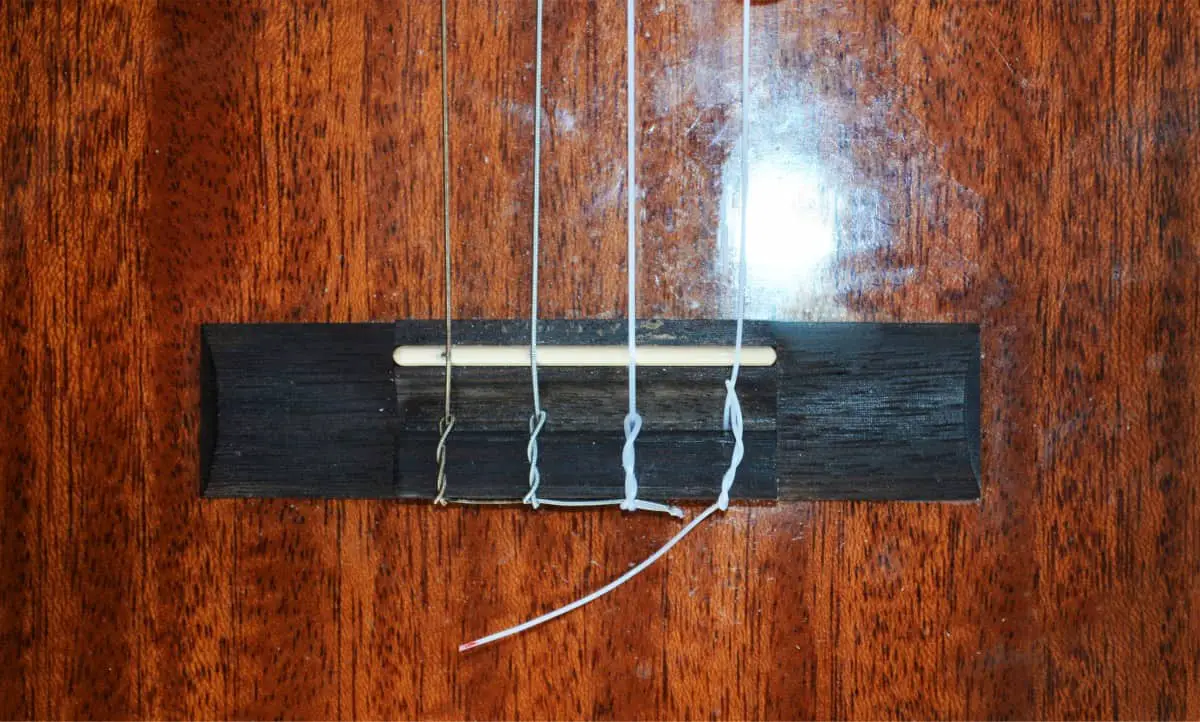
Step 7: The finished loop should look a bit this. In theory, you can form as many loops as you wish, but it’s generally unnecessary and becomes trickier with each additional loop.
Three for the standard strings and two for the wound ones is quite adequate. It’s a personal preference of mine, but I like to form a fourth loop on the thinnest strings to provide the maximum amount of grip.
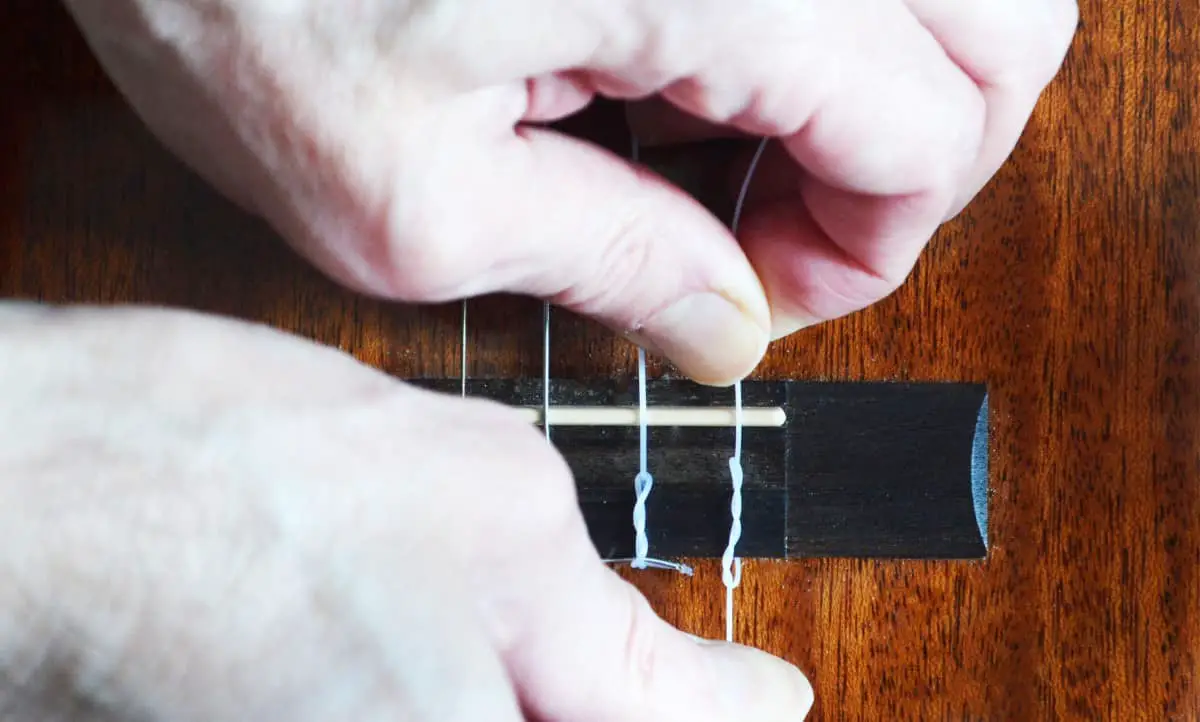
Step 8: The final part of the process is to pull the strings tight.
If it’s tricky to grip the remaining stubby end of the string, find a pair of flat-ended pliers to give you greater tension.
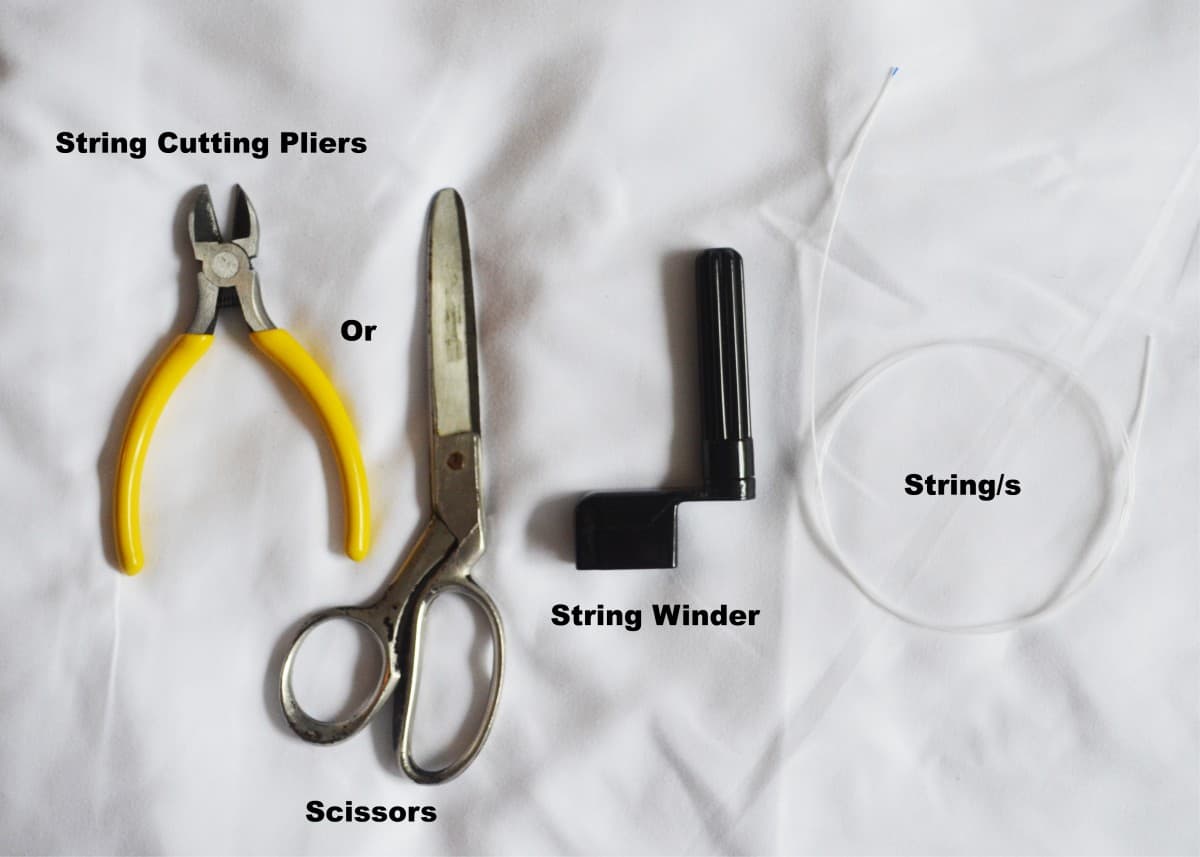
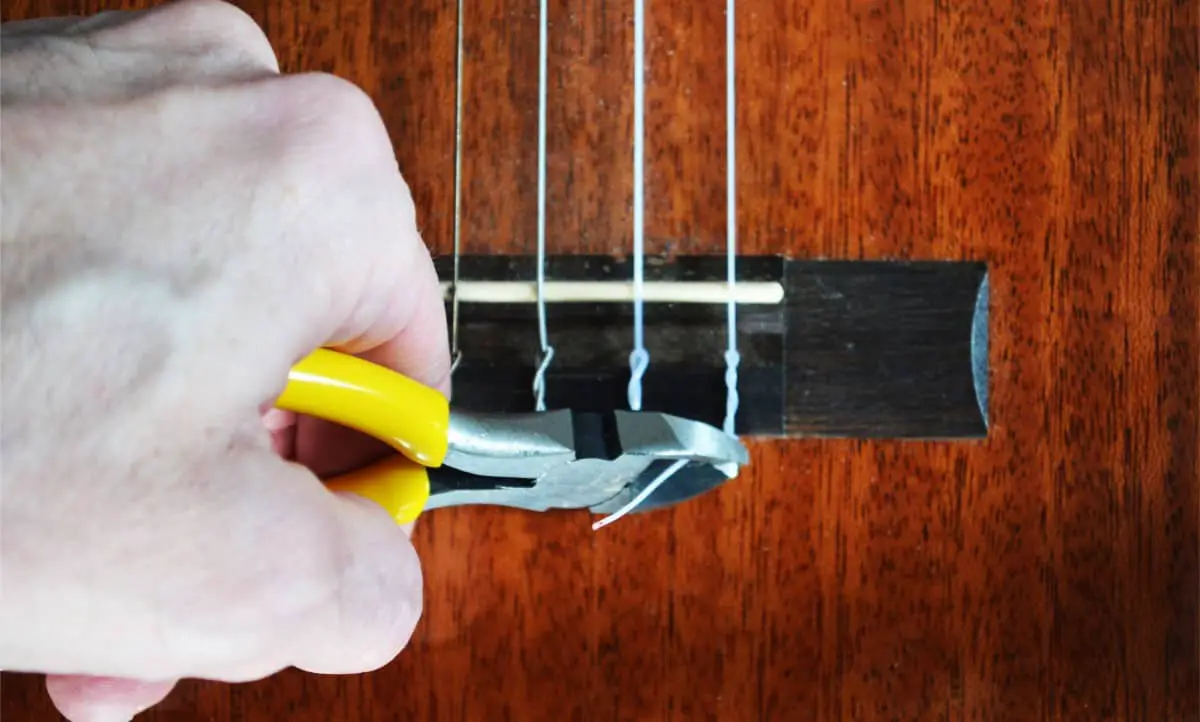
Step 9: to finish off and to make the knot look a bit bit neater, snip off the end with a pair guitar string pliers or wire clippers. Scissors should also be fine for this job.
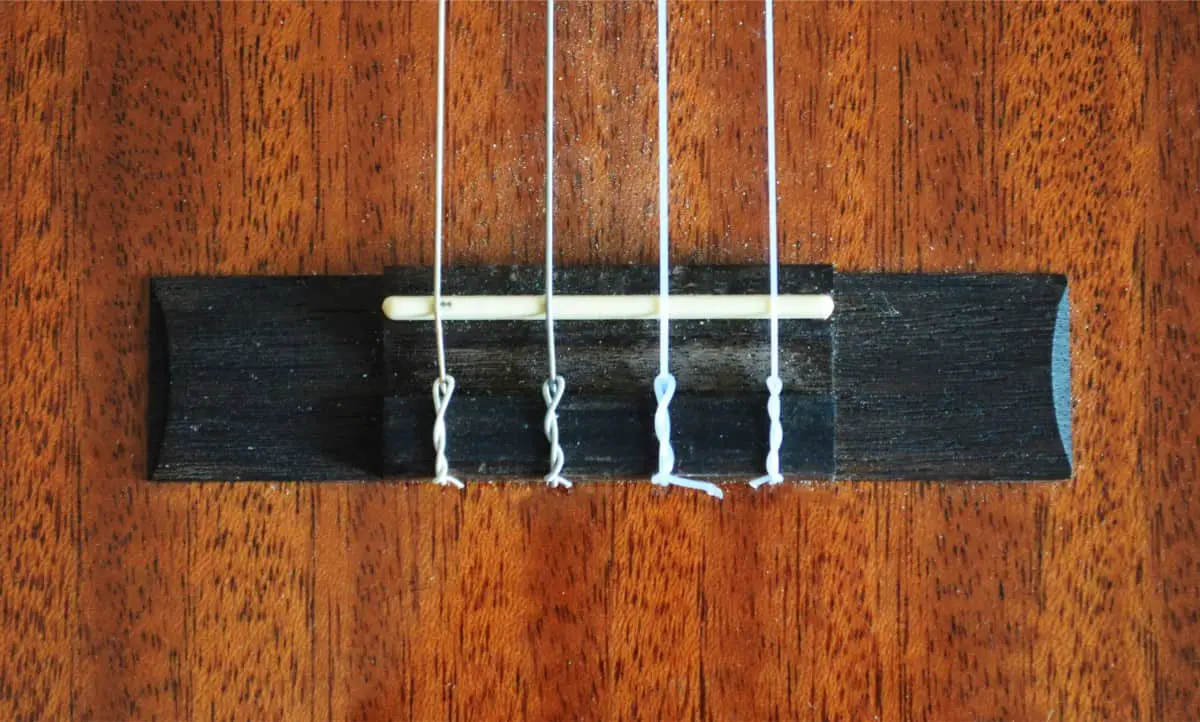
Step 10: The finished string with the excess removed.
One thing that can be easily overlooked is to make sure your string is sitting firmly in the groove on the top of the saddle. If it isn’t, you may get string buzz or bad intonation.
How to Install Ukulele Strings onto a Pull-Through Bridge
As I mentioned above, before you get underway, you’ll need to have your ball or bead ends at the ready. If it’s for a whole set of strings, you’ll need four.
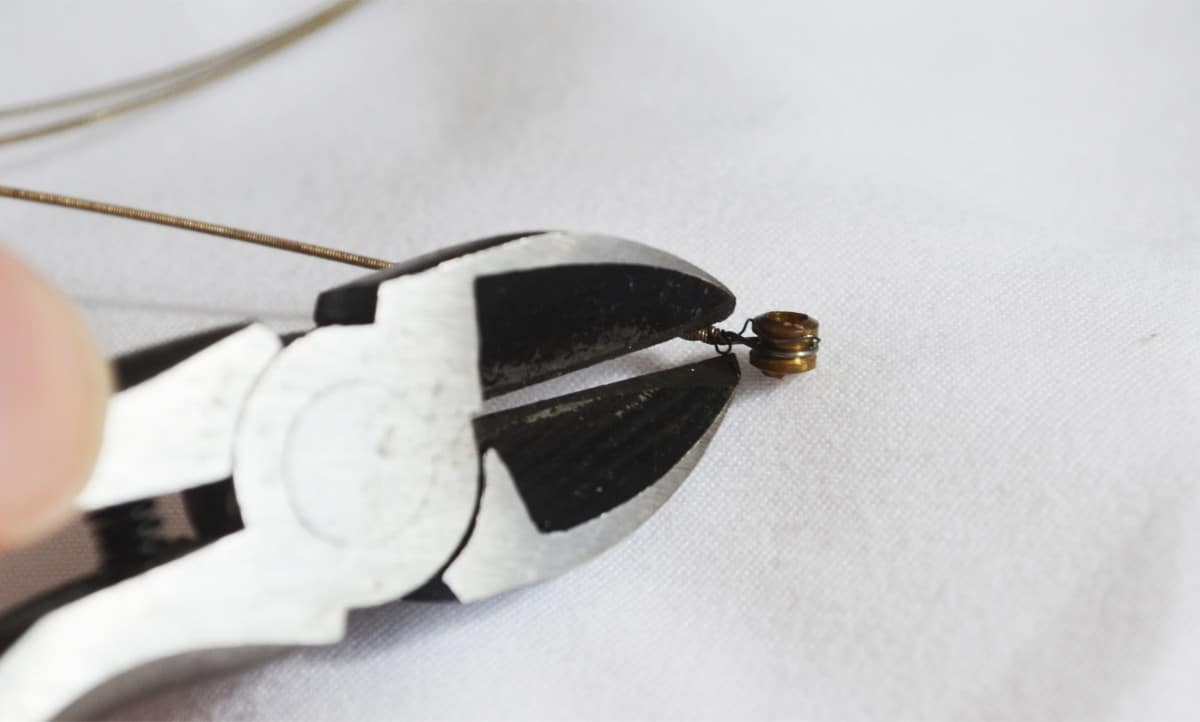
If it’s a bead, no preparation is necessary, but if you’re intending to use a ball-end from a guitar string, you’ll need to snip it off the end the existing string first:
Snipping it off with a pair of string cutting or wire stripping pliers:
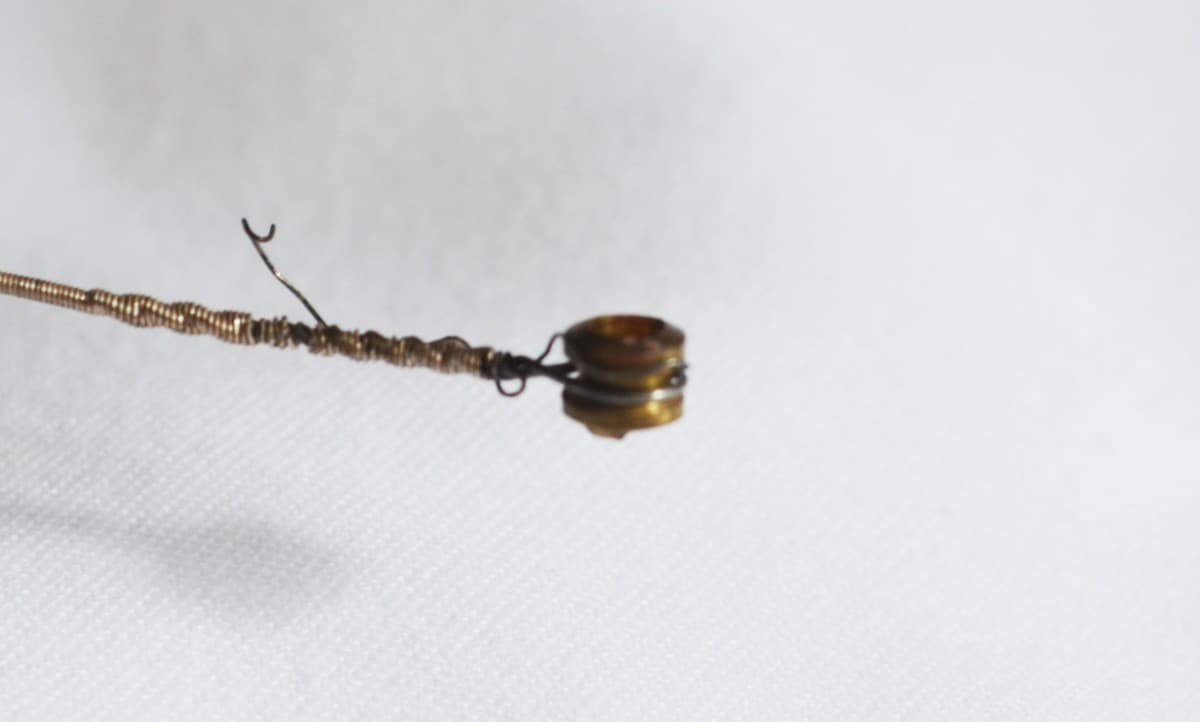
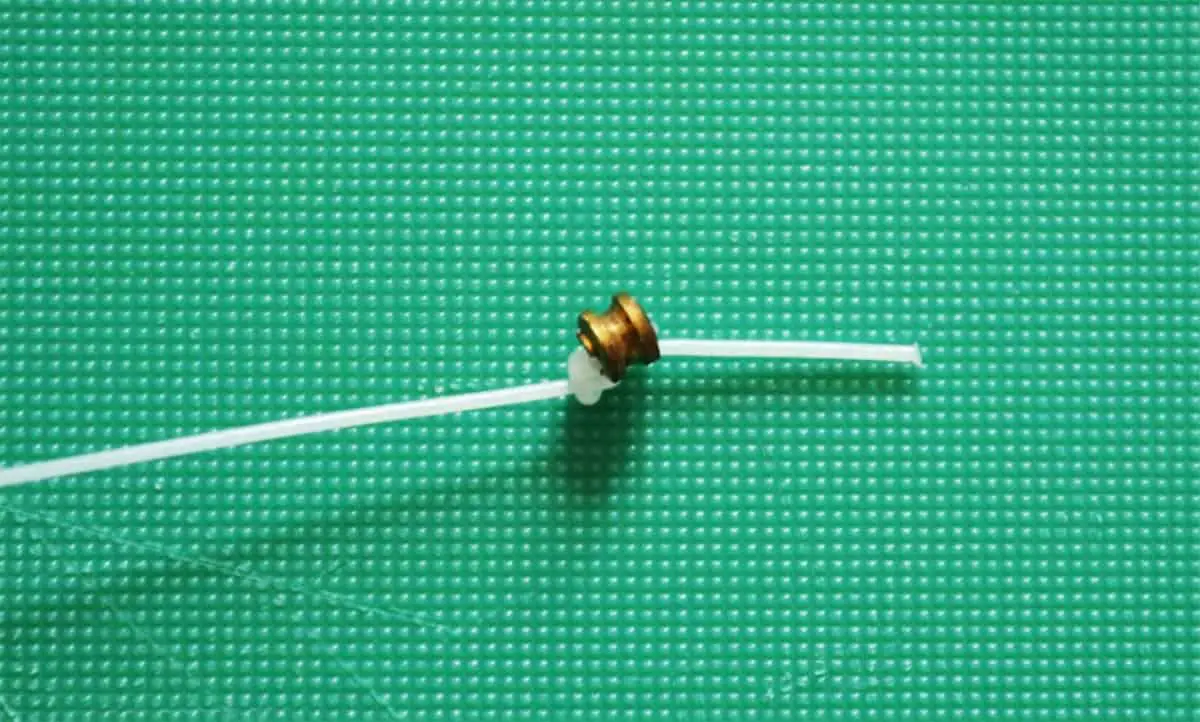
Free at last! The ball-end, minus the string:
After this stage, you’ll need to feed the new string (without the ball or bead end on yet) through the hole on the bridge.
Now comes the fiddly part, where you grope around inside the soundhole to grab the end of string. Normally, you can grab the end fairly easily if it’s a standard sized soundhole, but it’s quite small, use a pair of tweezers.
The next step is to tie your ball or bead onto the end of the string poking through the soundhole. A couple of knots should be quite adequate:
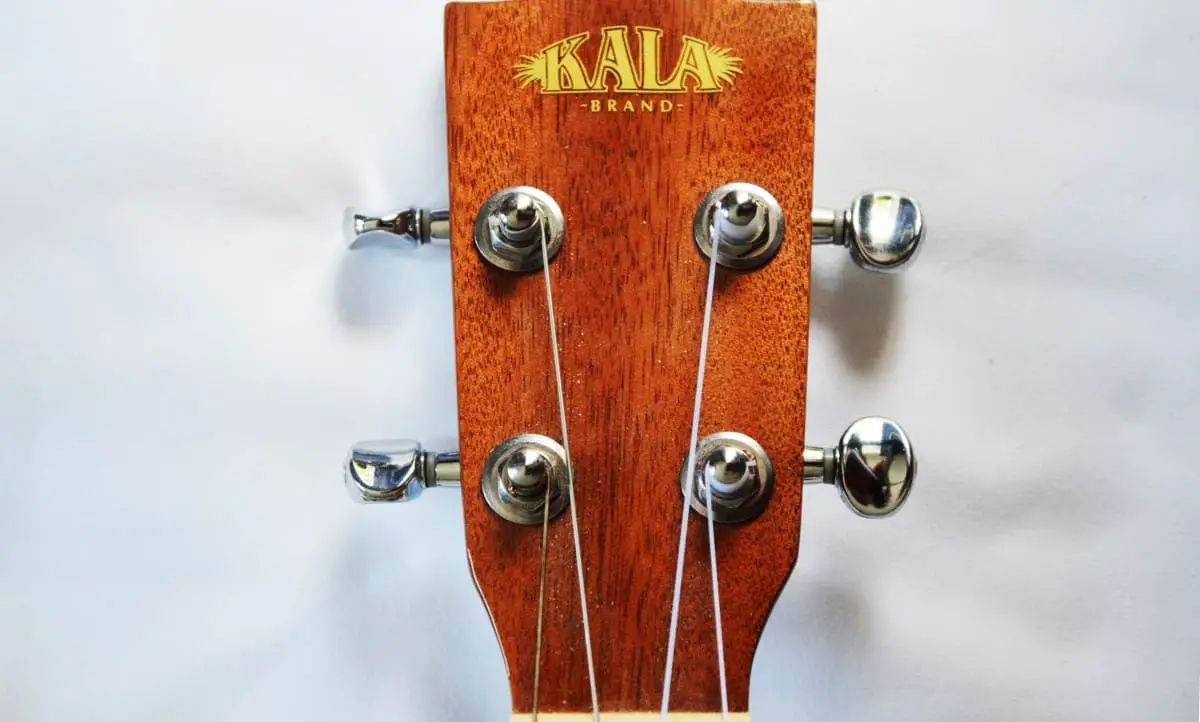
Installing and Tying Ukulele Strings around the Headstock Capstan
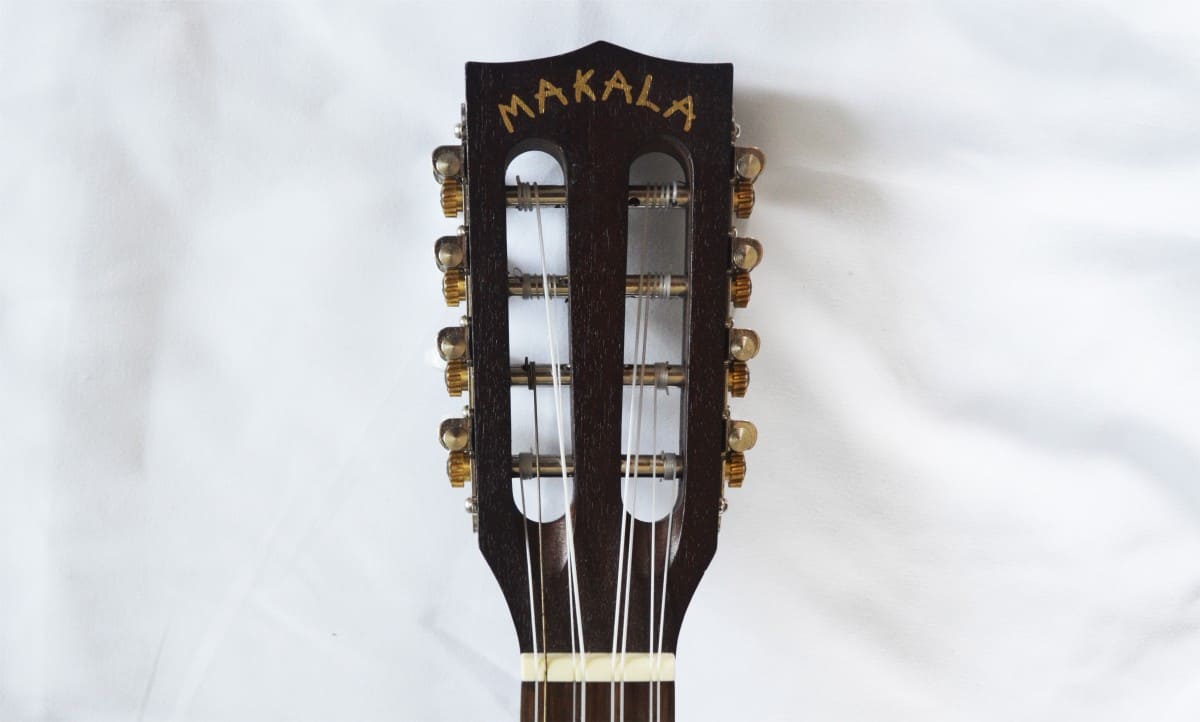
This process applies to any ukulele regardless of the bridge format. The only variation to consider is whether your uke features standard capstans which protrude from the headstock (the little metal posts the string winds around) or the less common classical guitar-style capstans which run from side to side.
Whichever style of headstock your uke may feature, the process is fundamentally the same, except you’ll be winding the string on from a different angle, in the above example.
Here’s a step by step photographic explanation of the whole process, featuring a standard capstan arrangement:
Step 1: feed the end of the string through the hole in the capstan. Remember to always feed the string through from the middle of the headstock; i.e. the tuners nearest to the floor will be fed from left to right and the opposite for the tuners nearest to your chin.
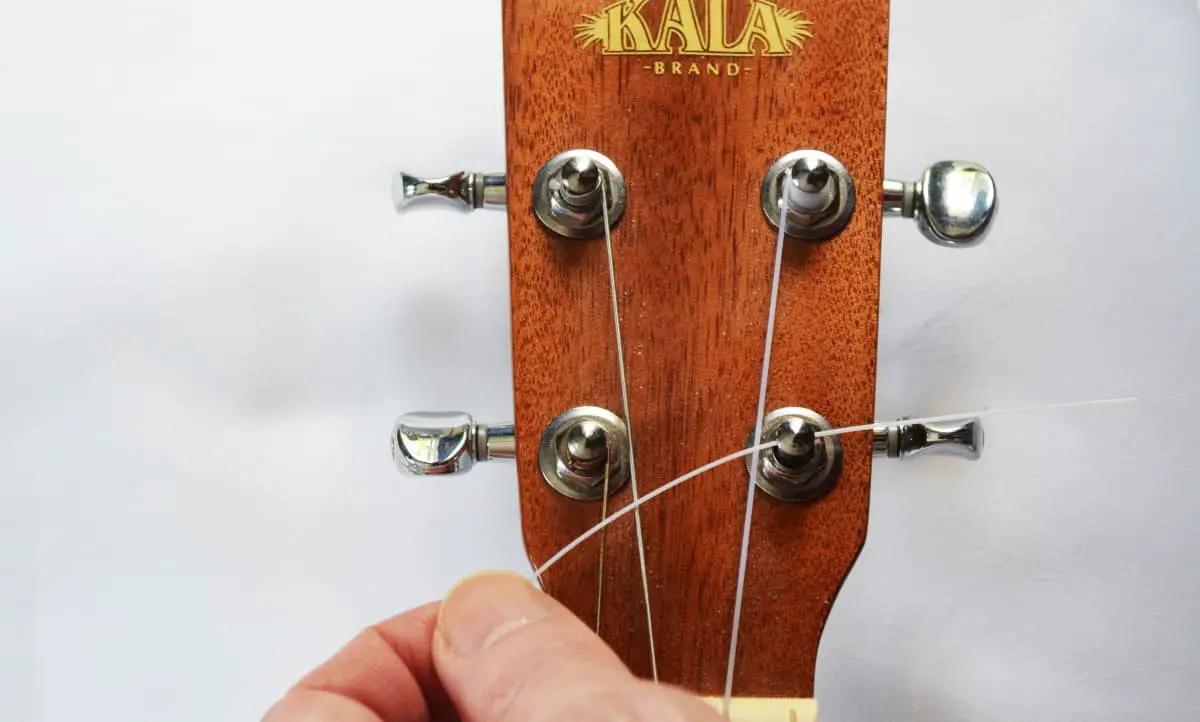
Step 2: There’s always a debate on how much string you need to wind around the capstan. Some musicians use very little, whilst others prefer a more secure footing for the strings.
In my opinion, it’s best to strike a happy medium. If you use too little, it can put undue tension on the string and too much will leave you with a lot of bulky excess wound around the capstan.
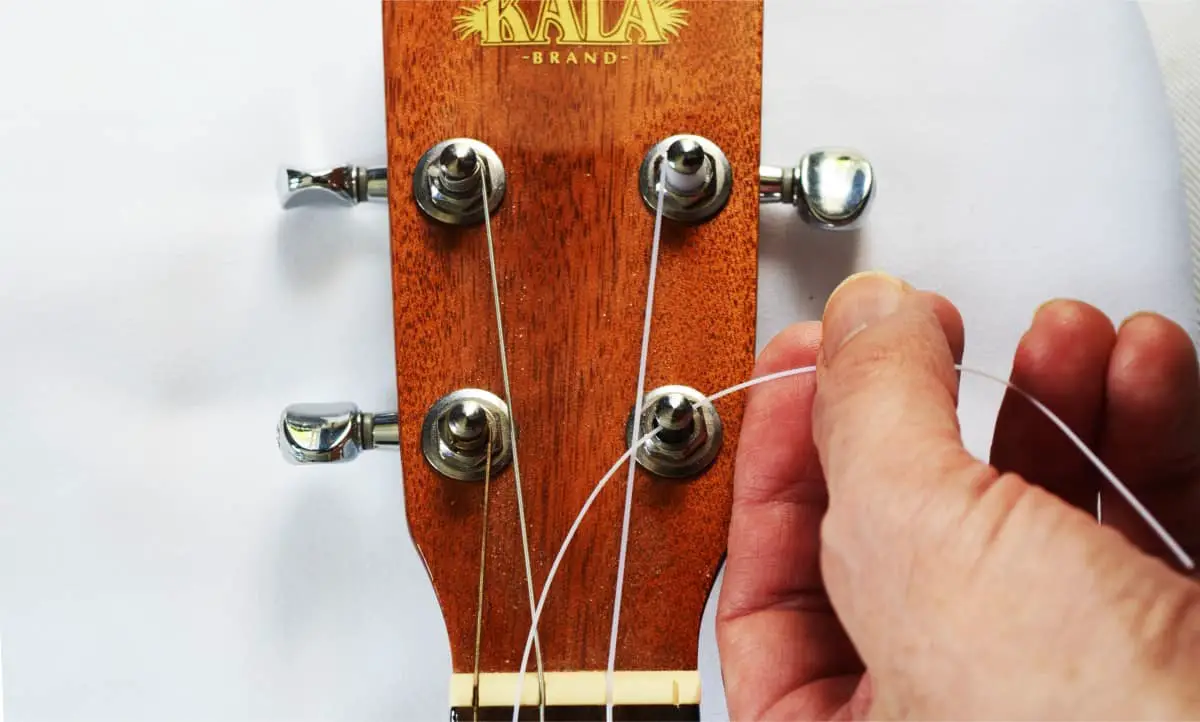
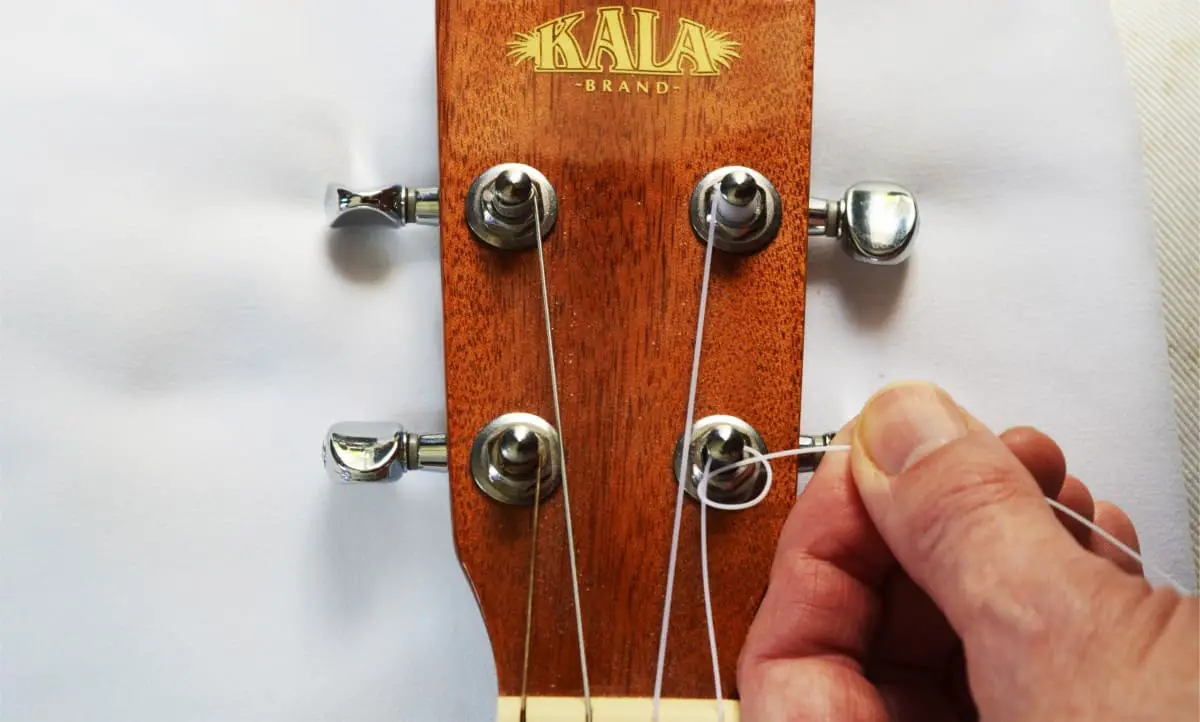
Step 3: Bring the string end around to form an ‘O’.
Step 4: Bend the string around to form a right angle.
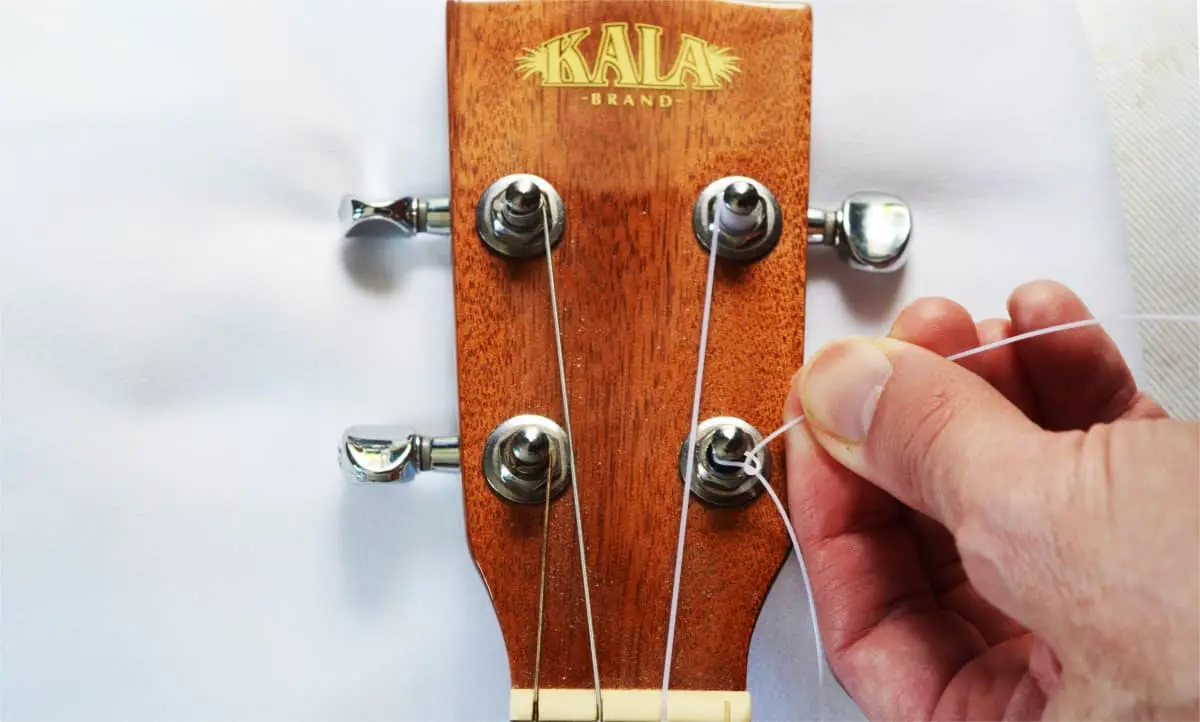
Step 5: Bring it around to form a knot.
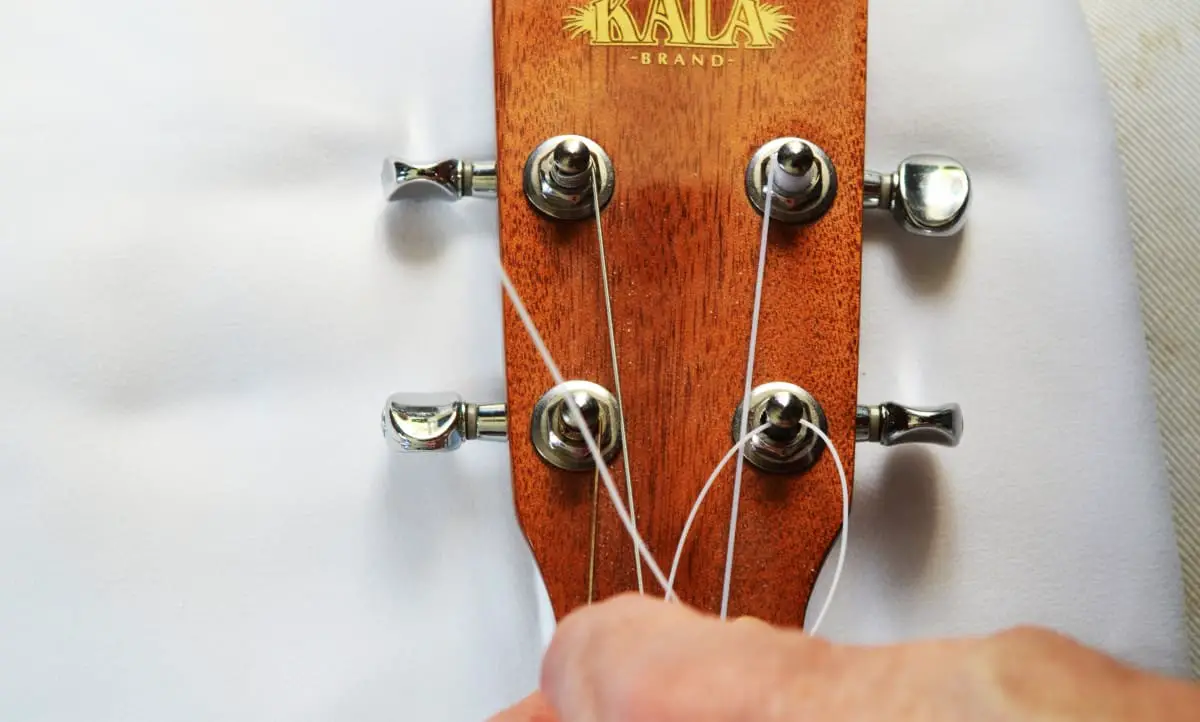
Step 6: Tighten the knot. Use flat-ended pliers if you need to create extra tension on the loose end of the string.
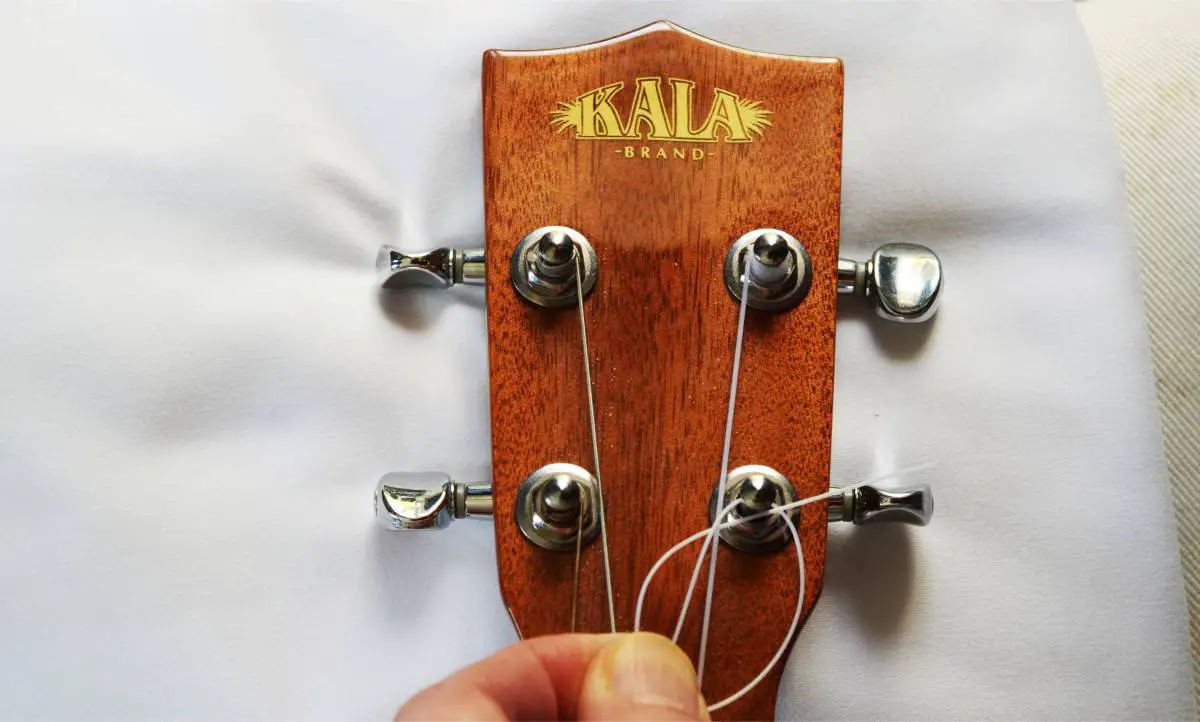
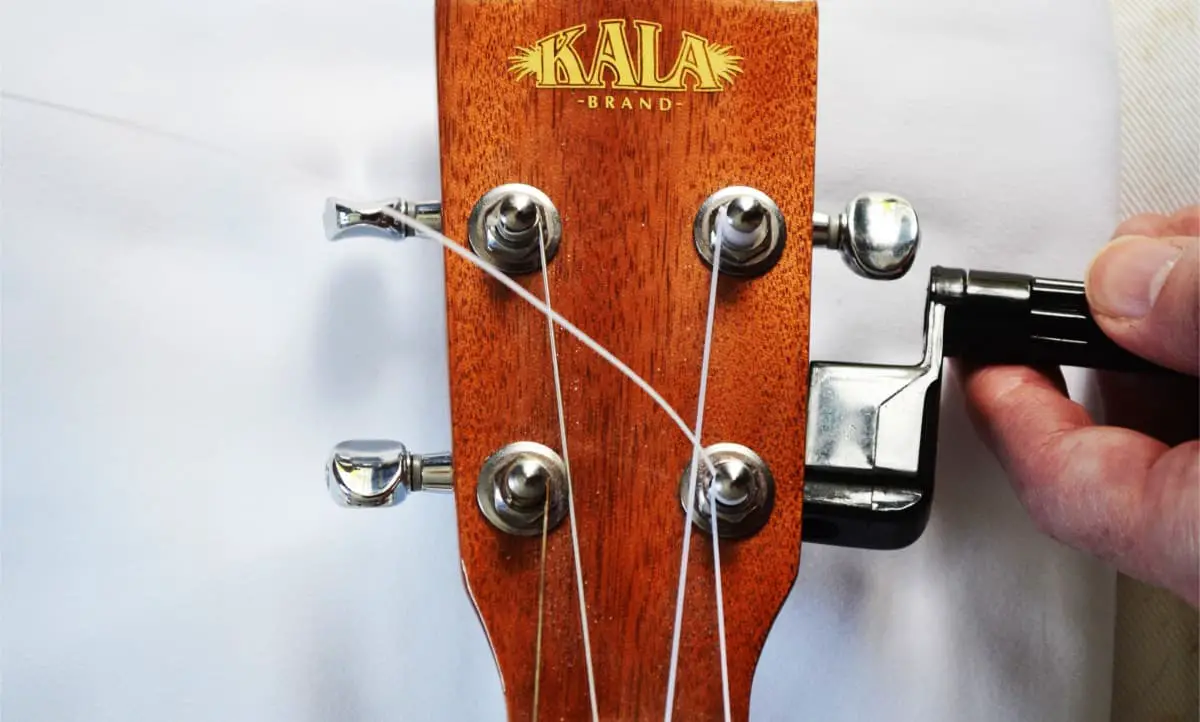
Step 7: Slip the string winder over the head of the tuner and start taking up the slack. It’s important to remember to turn the underneath tuners (strings 1 [‘A’] and 2 [‘E’]) in a clockwise direction.
The top two tuners (strings 3 [‘C’] and 4 [‘G’]) should be turned the opposite way, in an anti-clockwise direction.
Step 8: When the string is wound up to the correct note (use an electronic chromatic tuner if possible), snip the excess off with a pair of guitar string cutting pliers, wire stripping clippers or scissors.
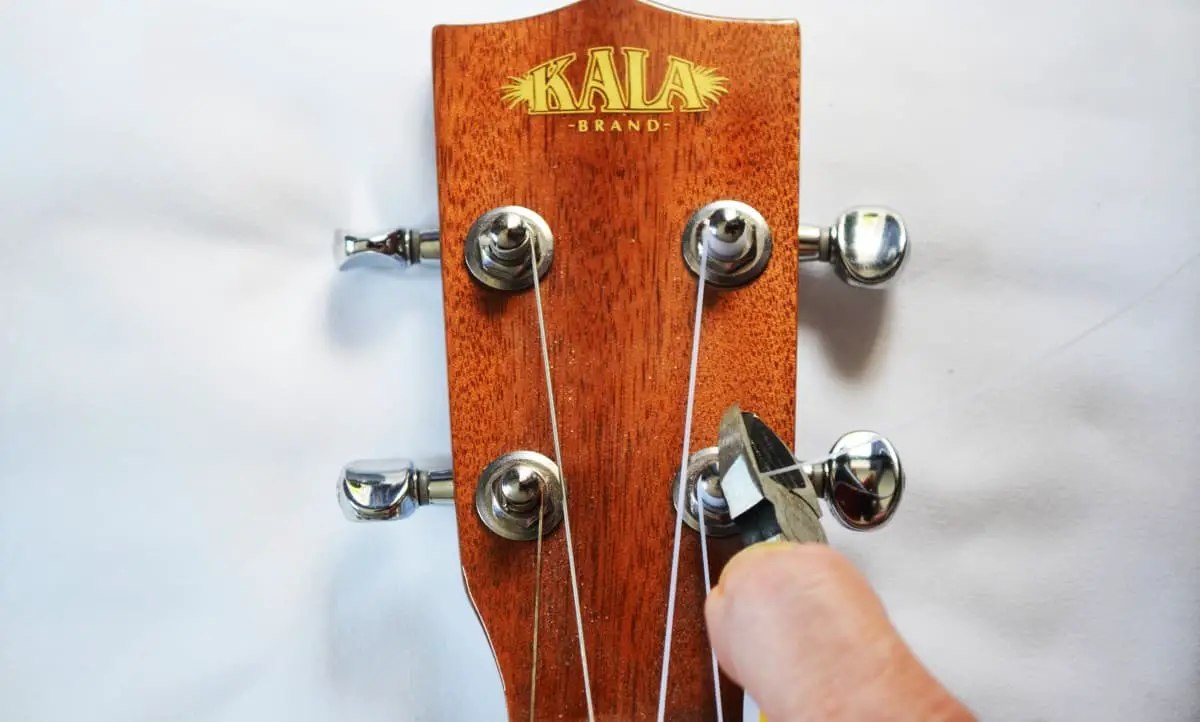
Step 9: The finished process with the excess string removed.
This isn’t strictly necessary, but it does make the headstock of your uke a lot neater. It also eliminates the risk of poking someone’s eye out with the bit that’s left over!
One word of caution following a string/s installation. Don’t expect your new strings to hold their tuning and tension immediately. It will take a few days for the string to ‘settle down’.
You can speed the process up a bit by stretching the string perpendicular to the soundhole, rather than up or down, but don’t expect everything to remain perfectly in tune from the moment you put the new string on.
Also, the more you play it, the quicker it will start to settle. A gigging or professional musician will usually have a back up instrument should a string break mid-performance. If not, they will have to rely on a lively line of patter and be prepared to re-tune regularly between numbers!
Which Knot To Use When Tying Ukulele Strings
A double or triple not will usually suffice. There may be alternative stringing methods used by some people, but in the main, my feeling is why mess with the tried and tested formula when you don’t have to?
As I said earlier, you can circumnavigate the whole tying process by putting a ball-end or bead onto a tie-block bridge, but if you’re likely to be playing with other ukulele or fretted instrument players, be prepared for the odd negative comment or two!